The first ‘recipe’ I wanted to do was smoked chicken tacos because of how simple it is to get right and how delicious it is when it’s done.
Smoked chicken is perfect to add to all sorts of dishes – over our time I’ve used it in curries, tacos, fajitas, chimichangas, pizza toppings, served in buns and in gumbo to name a few. It’s cheap to try and you don’t need to worry too much about checking it during the cooking process – it really is hard to get wrong!
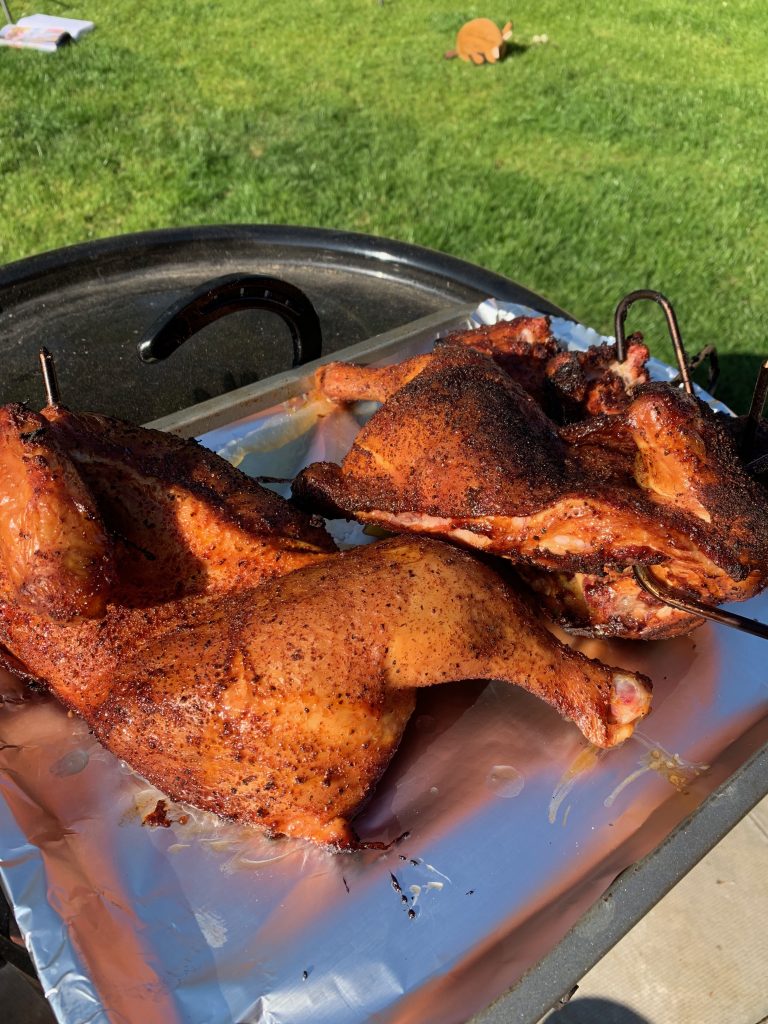
Depending on the size of your smoker and the attachments it has you might be able to cook more than one chicken at a time. Generally I cook 3 at once after splitting them in half through the back and breast bone. This means you have 6 half chickens to go at once which for us, serves a group of 8 with leftovers – obviously you could do smaller amounts or leave the chicken whole. When we smoke our halves, we have two rods for hanging meats in our smoker – this means they sit with hooks through the thickest part between ribs to ensure its nice and secure! You need to remember to keep to halves or wholes if you can otherwise you will need far less cooking time and run the risk of small cuts drying out!
Smoked Chicken Prep:
When you want to prepare a chicken, make sure you pick up some good large ones from the butcher, supermarket or supplier and apply the rub the day before so that it can refrigerate overnight for extra flavour. I like to cut the chicken in advance – if you are halving the chickens use a bread knife – that’s a tip I learnt after trying with normal knives and struggling, the serrated edge makes a huge difference. If you have half chickens, lift the skin slightly and add the rub over and under the skin to get it into the meat. If you have a whole chicken, gently pierce the skin and lift to add the rub underneath.
BEFORE adding the rub – you need a slather. The term slather is American but it just means adhesive/base – this for me tends to be either oil or mustard depending on the meat we are cooking. For chicken I use vegetable or olive oil. Add a good glug over the whole or half chicken and get your hands in to cover all areas including underneath the skin. Make sure the skin is put back though for protection from the heat. No protection from the heat = dry meat.
Next it’s time to add the rub. The rub recipe below is a classic I picked up from the USA – it has no salt content as it tastes slightly sweeter, it gives the chicken a herby flavour which is lovely with the smoke and you can make a big batch to use on veggies and potatoes to go with it! This makes around 2/3 of a cup so you can adjust accordingly!
Rub recipe:
1 tablespoon dried crushed parsley
2 tablespoons dried crushed sage
1 tablespoon dried crushed rosemary
1 tablespoon dried crushed thyme
1 tablespoon dried crushed oregano
1 tablespoon dried crushed basil
10 bay leaves (crumbled)
1 tablespoon ground black pepper
1 tablespoon sugar
Coat the chicken liberally, both sides even where the bones are, under the wings and around the legs and cover before putting into the fridge overnight to soak in. It improves the flavour tenfold.

Cooking the chicken:
The best bit – following the steps for your smoker of course – or from the guide in my first smoking blog, get set up and get the smoker running at around 265F in the chamber.
When you add the chicken to the smoker either on the grill grate or hanging, do this in a swift fashion to avoid too much heat escaping. Ensure the chicken is skin side up if it’s on a grill grate to get the crispy skin that won’t be stuck to the grate!When all the pieces are inside, add the probe to the thickest part of one of the breasts and set the lid on for the cook. (This is where a two probe thermometer is best!)
The internal temperature you are looking for with chicken is around 165F – once the meat hits this after around 2.5/3 hours you can pull it off to rest. At this point the chicken should have a rather nice dark crispy skin.
Leave to rest for at least 10mins under foil and a tea towel to retain heat, this lets the fibres relax and remain juicy.
One thing I do need to stress with smoked chicken is that when you cut into it or pull it – there WILL be pink. I know we are taught from the dawn of time that pink chicken is very bad – however this is a by-product of being smoked – when you look at the very centre of the breast it should remain white. Thighs and wings (dark meat) will remain pink to white also. It can look alarming to some, but this is where the smoke has hit the bird and it is perfectly safe.
Another good recipe I have used is for a spicy rub – This goes down well with the boys especially after adding some buffalo sauce after cooking:
3 teaspoons salt
2 teaspoons paprika
2 teaspoons brown sugar
1.5 teaspoon black pepper
1 teaspoon onion powder
1 teaspoon garlic powder
1 teaspoon dried thyme
1/2 teaspoon cayenne pepper (optional, but recommended- hot hot!)

Saucing and serving:
Sauce is up to you for the dish you are making – for adding chicken to a dish as a collective you won’t need it, but if the chicken is the star of the show then a good sauce is essential.
I don’t make my own yet admittedly, because there are so many out there which hit the spot after a homemade rub – a few of my favourites are:
Sweet Baby Rays – the best traditional BBQ sauce, amazing smokey depth. Great for pulled chicken on tacos!
Reds Carolina Sauce – a hot Carolina sauce from the Reds True BBQ gang, you get this in their restaurants UK wide, they also have other really good sauces.
Franks Red Hot Wings – exactly what it says on the tin… Buffalo sauce – nice and hot! The Sauce Shop also do a good buffalo.
Jack Daniels – because Jack Daniels. Those who don’t like whiskey in their food have issues… or is it the other way around?
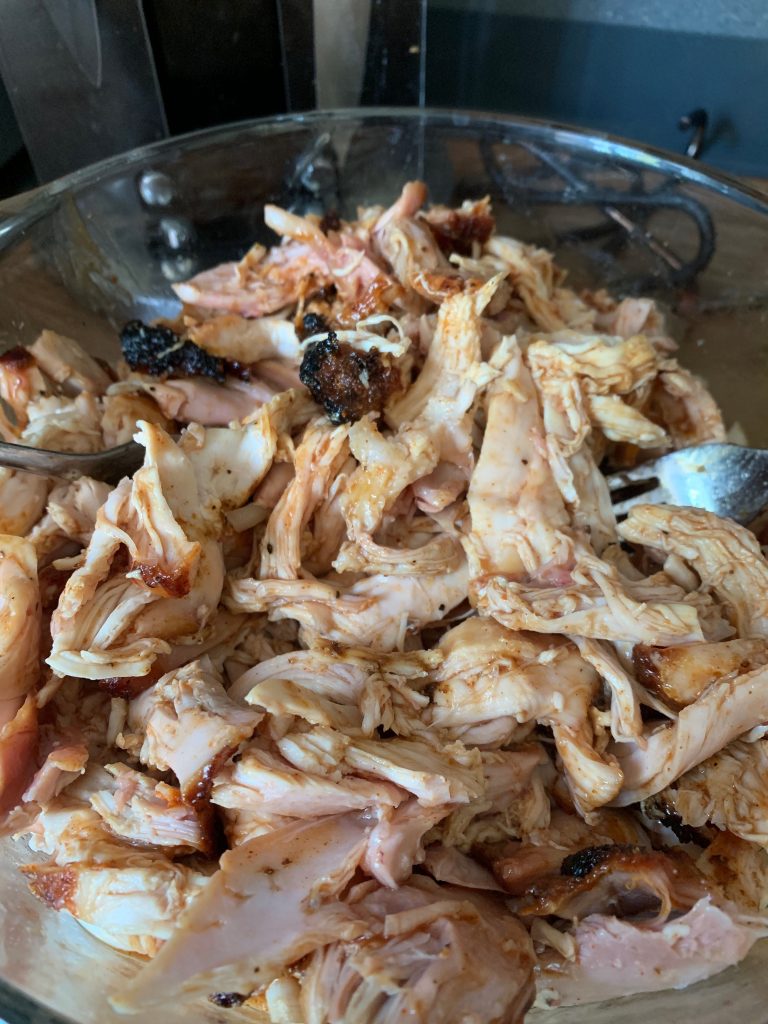
Serve however required- shred it and add it to a curry, gumbo, paella, taco, jacket potato, pasta, skin on mash and veggies or serve it as a whole half with chips and corn on the cob! Anything goes. I’ve even left out the sauce part before and just served it up as a Sunday roast – Delish!

BONUS TACOS!
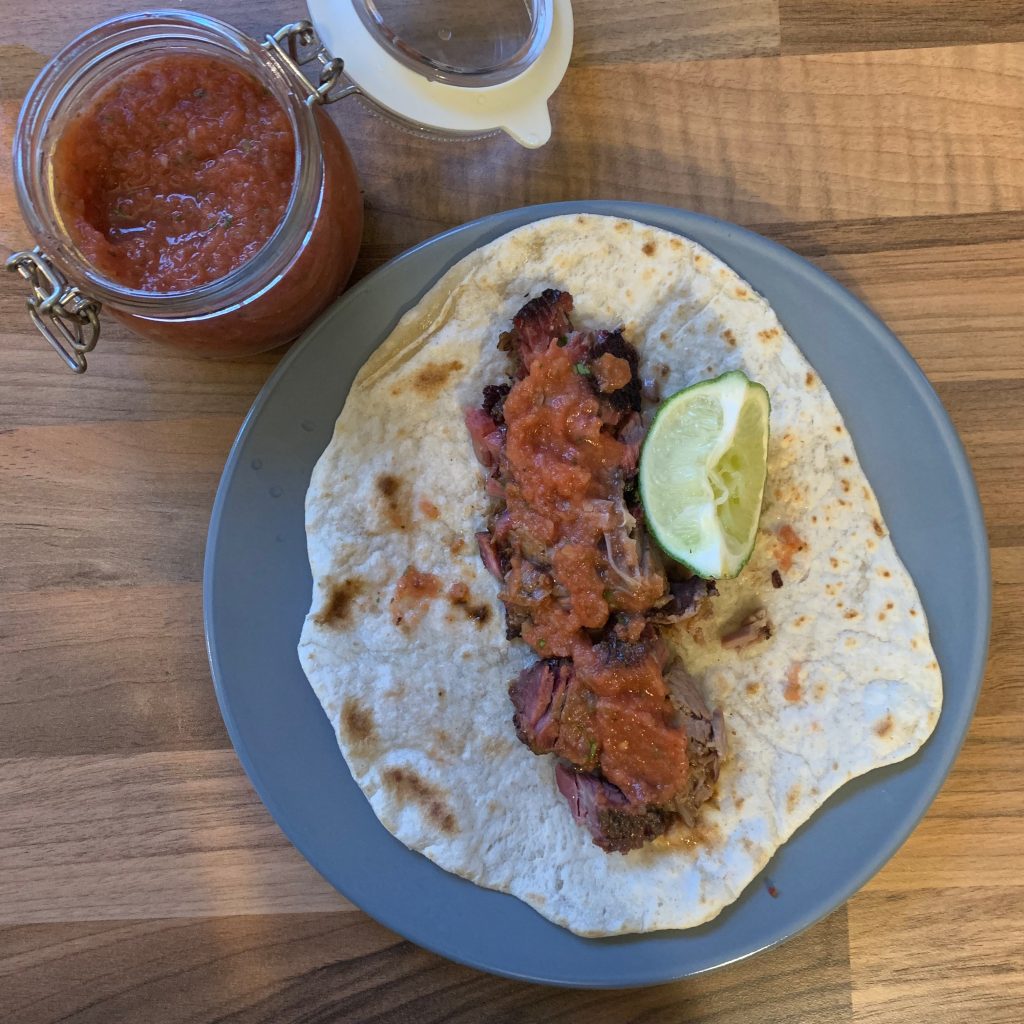
As a bonus for this one. I wanted to give you my recipe for authentic soft Mexican tacos. These obviously aren’t for the smoker but my word they beat ANY wrap from a supermarket, they take so little time, taste incredible and they give you an authentic Tex Mex experience with some pulled chicken and homemade Pico de Gallo.
We actually discovered how good soft Mexican tacos were in Austin when we visited Valentinas Tex Mex – famous for brisket tacos. Best small meal of my life. Hands down! Something about the soft texture, they never broke, it wrapped the meat like a fluffy fried blanket, soaked up the sauce, and soaked up my feelings.
When I got back I did some research and it turned out the recipe is basic – the difference in what they do is they use LARD. Yup. that fatty stuff nobody buys.
So here we are:
3 cups all-purpose flour
2 teaspoons baking powder
2 teaspoons salt
¾ cup shortening (lard)
¾ cup hot water
Step 1
Combine the flour, baking powder, and salt. Either by hand or with a pastry cutter, cut in the shortening till the mixture is crumbly. If the mixture looks more floury than crumbly, be sure to add just one or two more tablespoons of shortening till it is crumbly. Add about 3/4 cup hot water to the mixture, or just enough to make the ingredients look moist.
Step 2
With your hand or a large fork, knead the mixture making sure to rub the dough against the sides of the large mixing bowl to gather any clinging dough. If the dough still sticks to the side of the bowl, add a couple more tablespoons of flour until the dough forms a soft round shape. The dough is ready to roll out now, but it is best to let it rest. Cover it with a dishtowel, and let it sit for about an hour or so.
Step 3
Take the dough, and pull it apart into 10 to 12 balls. Lightly flour your rolling area, and roll each ball with a rolling pin to about 1/8 inch thickness – just so you can lightly see through them.
Step 4
Place each tortilla on a medium hot cast iron skillet or a good frying pan that’s hot. Cook for about 1 to 2 minutes on each side, or until the tortilla does not look doughy. You can tell by watching it bubble up, when it bubbles up its going good! I like to see char marks on them personally!
It takes some practice but I promise they’re worth it and you won’t buy in tacos ever again – they’re that good. They go down a riot when I make them at home. Disclaimer – photos were of the brisket I made in them, I tried to recreate our Valentinas experience!
Enjoy!