For those who haven’t met me yet I’m Jade, I’m the proud mum of an 8 month old called Finley, a lab called Django and a Browning B725 sporter shotgun – oh and I’m insanely passionate about BBQ and Smoking.
So for this BBQ week I want to bring a couple of blog posts to you to introduce the world of Smoking food to those who haven’t experienced it before – it will level up your hosting game and I can guarantee when you’ve cracked low and slow you won’t want to go back to conventional BBQs!
My passion for it came from numerous trips to the USA, I’ve been lucky enough to tailgate for the Minnesota Vikings and indulge in drinking and BBQ from a flatbed truck, spend 5 days on a dude ranch in San Antonio, get married in Las Vegas and visit enough to sample the mad food there and spend a week in Austin hitting the best smokehouses having tours to see how the professionals do it! All of that meant we quickly bought a drum smoker to use here which was intended to be for me and the husband to use – turns out its me that takes sole pride in it!
For this post I want to introduce you to Smoking – the art of indirect heat, ie: pure smokey flavour from briquettes and wood fire which is situated a distance from the hanger/grate so no charring occurs like a normal BBQ. It takes patience and some knowhow on heat management, but when you’ve cracked it – you’ve cracked it, and its insanely fun to experiment!
So I’ll break it down into some sections:
- What smoking is
- Types of smokers
- Equipment essentials
- Setting up for a cook
- Tips and a last word
What is smoking?
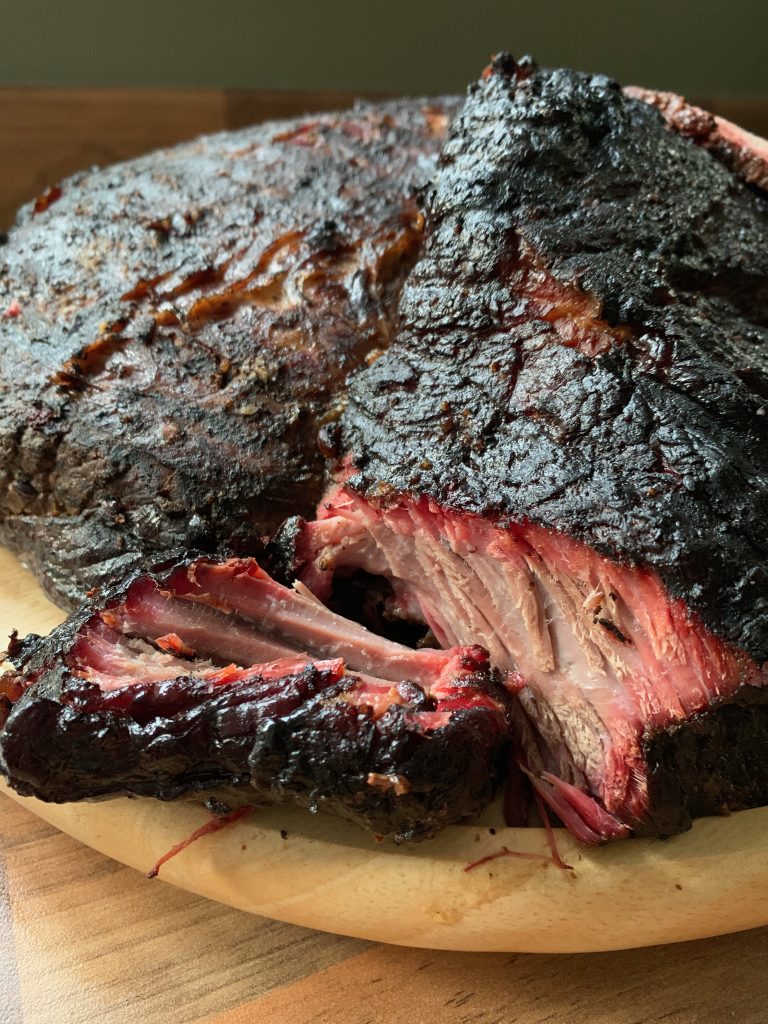
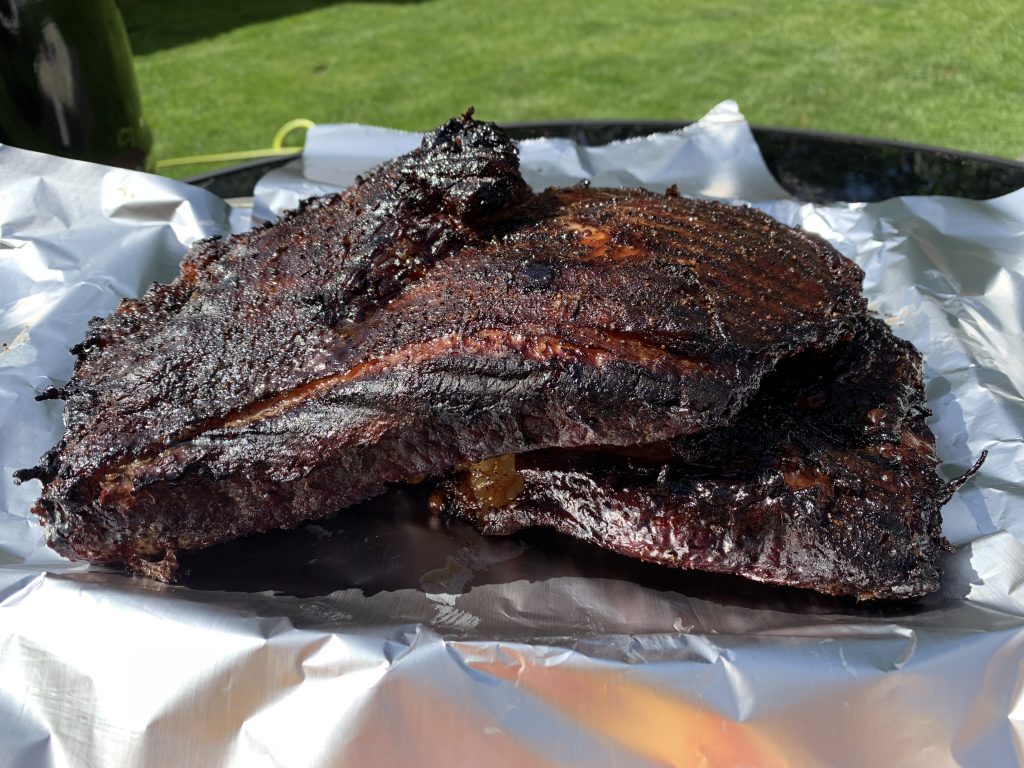
Smoking is the method of cooking using indirect heat – where the heat source is located either above or to the side of the cooking area which means the smoke output and heat slowly cook the food without the hot fast charring effect normal BBQs have. The art of it is controlling heat to ensure the food gets a long enough time to cook depending on meat type – an example here is to compare chicken with brisket. Chicken as a whole bird takes about 2hrs 30 to cook and crisp low and slow whereas the brisket will take from 9 hours (depending on how low and slow you want it) to render the fat and allow the meat to tenderise.
To control the heat, it generally involves using vents to control air flow going into the smoker itself – when you open vents more air stokes the heat source therefore increasing the temperature and if you close it off, it regulates and reduces, so you initially raise it and then maintain as best you can.
The idea with low and slow based on having vents is to set it and leave it – so you shouldn’t be opening to peek frequently as this will throw off the internal temperature! But more on those later…
Types of smoker:
Classically there are a couple of types of smoker. Ours is called a UDS (Ugly Drum Smoker) or upright smoker and there are offset smokers. You can use some conventional BBQs too but you just have to add a few things and change the layout of the heat source.
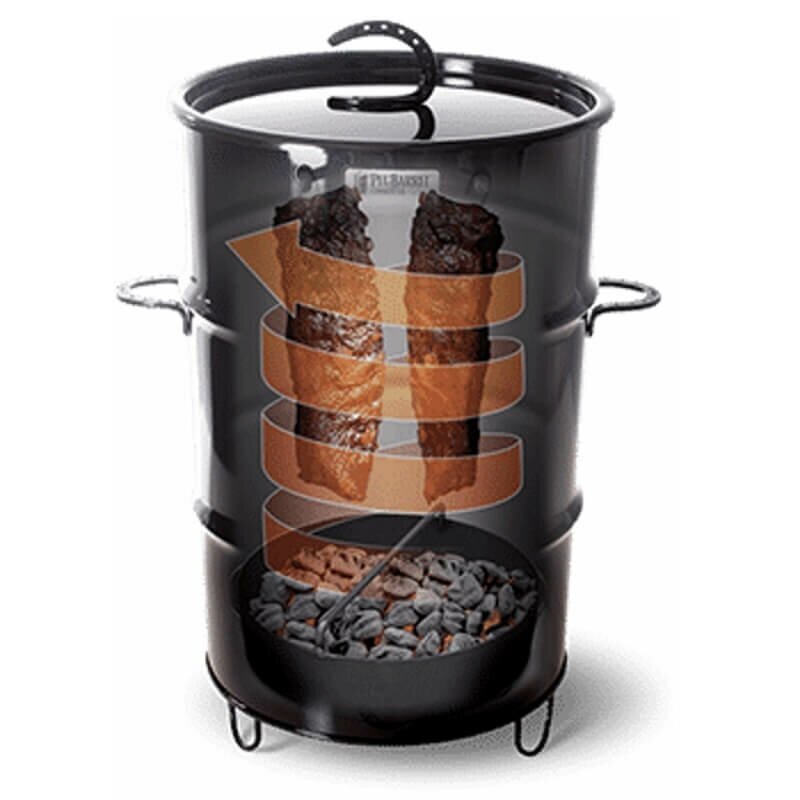
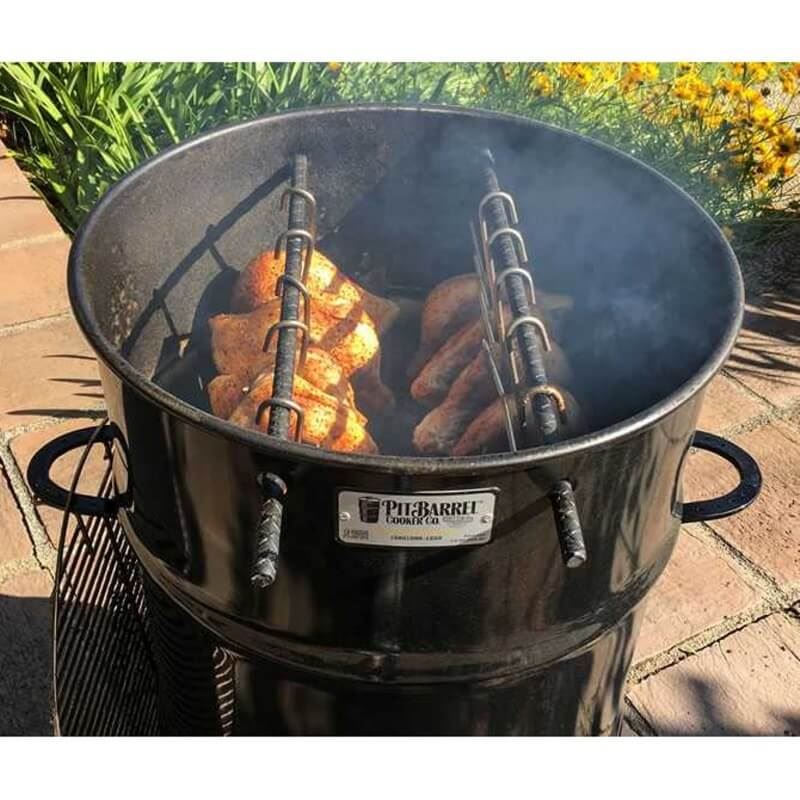
UDS – the upright smoker. These can be in the shape of a barrel, or look like the Kamado Joe style ceramic eggs. Essentially the heat source is at the bottom of the container, then the grate or the hanger is situated at the top so that the heat rises but the coals never come into contact. A lid is essential to keep the flow of the heat circulating within the smoker and vents usually located at the bottom are used to increase or decrease the airflow to raise or choke the temperature. For UDS smokers I use a combination of charcoal briquettes and wood chips to avoid causing flames which could potentially touch the food. These are a really easy type of smoker to use and after having one for 3 years now I highly recommend the pit barrel cooker for an inexpensive UDS to start anyone off and be a great addition to their cooking!

Offset Smokers – The OG and the main way of smoking we saw in Texas on a huge scale. Offset is what it says, the heat source is offset from the cooking chamber – so it looks like a big drum attached to a small one. The heat and smoke flow through a portal into the cooking chamber where they circulate around the food and exit through the chimney. You control the heat and smoke flow in an offset smoker—in theory, at least—by adjusting the air intake and exhaust vents the same as you would with a UDS but just in different locations. This type of smoker is generally wood-fired – so you will see flames but being offset the flames still never reach the food itself thus having no danger of burning or overcooking.


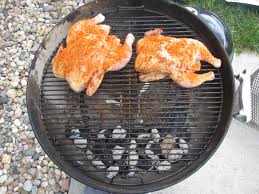
BBQ smoking – If you have a type of charcoal BBQ that looks like a circle on legs (kettle BBQ) – you can use these to smoke. You might have noticed a vent on the lid and base – the same principle for controlling the heat the only difference here is that you need to set up charcoals and not wood either around the outside of the base leaving the middle exposed OR on half of the base and leave the other half exposed. On the other side which is exposed, you can then add a basic foil pan under the food to catch the fat drippings so that they don’t catch. You can add soaked wood chips to the coals for flavour but again without the risk of flames from catching.
Equipment Essentials:
After some trial and error, I found a few things I simply can’t smoke without as they play such a big role in making the process easier:
Fire Proof Gloves – Cheap on amazon, but they work – these will keep your hands protected when handling the super hot fuel, moving the food and touching hot parts. It’s just protection – but you need it.
Briquette chimney – Weber do a great one that’s lasted us 3 years strong so far. These will make it super easy to light your first batch of coals – you pop it onto your cooking grate full of coals with a lighter block underneath, light the block and the flames will catch the briquettes, come through and you need to wait around 10/15 mins until the flame dies off and the coals go white (you can see the clear heat above it with no smoke) then simply tip the basket of coals on top of your non lit ones.
Temperature Probe – We have a single probe but I would recommend the double. This is a small box with probes attached with metal wire that can measure the internal temp of the food and also the smoker temperature. Some smokers come with a temp gauge attached – by all means use it however a digital one will give you extra control and reliability. Having a double probe means you can simultaneously monitor food and internal chamber temp without needing to open the smoker to change where a single probe is located.
Ice Box – seems daft but an ice box is amazing for when you need to rest the meat after cooking, you can wrap it in foil, tea towels and pop it in the box to keep all the heat in. For brisket this rest period needs to be 2 hours long to aid relaxation so it’s good to keep it in a nice cosy place!
Setting up for a cook:
So you have everything ready, got your kit, your coals or wood and you’re staring into the pit – literally. First port of call is to set up your heat source – this means arranging the coals into the basket in a UDS or stacking your wood in a square method for an offset. Rule of thumb is that wood needs maintaining as it burns down so you will be adding more to it as you cook – for a UDS you can use long burn setups to keep the heat in for the entire cook without needing to top up!
When looking for your heat source try and get better quality if you can – for charcoal, do NOT buy the charcoal pieces always go for briquettes, lump charcoal breaks down too quickly and turns ashy leaving you with dirty smoke (grey in colour) rather than nice clean smoke (blue in colour). Weber is a good brand but Tesco do a good briquette too. For wood – please only buy wood from reliable sources and NEVER use any random wood lying around as you don’t know what chemicals it might have been treated with! Hickory, Oak, Cherry and Mesquite are great choices that offer different flavours to each other – in the UK though the most common you can pick up are Hickory and Oak. There are lots of places online that sell kits or big packs of chunky log pieces – Love wood is a great one. If you do however know a logger or someone who fells trees, take advantage! but make sure it’s fully dried out before you use it, so split it, dry it, burn it.
Light your coals/wood and get the temperature raised to around 265F by opening the vents and even cocking the lid slightly – this is why it’s great having the probe inside the chamber to know when it hits right! – at this temp it’s a great “not too hot not too cool” and you want to aim to maintain that as best you can. Just remember 265!
- don’t panic if it goes over, simply close the vents or lid and wait a few minutes for it to die down
- if it doesn’t come up to temp with just the vents, try cocking the lid slightly as this acts as a second vent
When you have your heat source in place (remember it takes practise!) and you are up to temp, you can add on the meat or food you want to smoke. I’ll be doing recipes with prep and seasonings… don’t worry!
When the meat is on the grate or hanging, pop the lid back on and leave it – keep an eye on that temp for the first half hour to make sure its levelled off, but leave the meat to it. How long you leave before checking does depend on how long the overall cook is for and what needs doing. So for chicken for example – I leave it for an hour and a half then have a quick look. Then leave it for the rest of the cook time until it hits the correct internal temp for cooked chicken and pull off to rest. Brisket on the other hand, if it’s a big chunk of meat I’ll leave it for 4 hours until the stall period (more on that in a brisket post)
Tip for first timers – birds are the easiest to smoke. Pheasant included.
Tips and words of wisdom:
Smoking is addictive, and you can take almost any meat or vegetable and produce cracking results if you give it the time and the TLC it needs. It’s fun to learn and keep a record of what you did to get good cooks, what went wrong on bad ones and it’s even better when you make your own rubs and marinades – but you have to get the principles right first – take time to learn and you’ll reap the rewards!
Take your time and be patient with it, some people rush to pull the food off and dig in right away then wonder why it isn’t tender and juicy, you need to rest everything you cook and you need to make sure it’s had enough time and it reached the safe internal temp for consumption! Nobody wants to poison at their BBQ!
Be experimental! Want to smoke the pheasant you shot? Go for it! Have it with tacos… want to smoke a venison haunch for a Sunday roast? Absolutely! A bit of chimichurri goes amazing on top! Christmas dinner turkey? Totally down for it – especially beer can turkey!
There is a lady who smokes in the USA who I absolutely adore following, Jess Pryles – she’s the master of cooking with smoke and fire and if you needed any more convincing that BBQs and Smoking is for you, go look at her Instagram – she also created the brand Hardcore Carnivore and is a total inspiration considering BBQing and fire food is known as a man’s game predominantly – I can tell you now though in this house it’s me with the apron and the fire gloves on and that won’t be changing!